DigitalOutbox Episode 91

DigitalOutbox Episode 91
In this episode the team discuss Lion, Quarterly Numbers and the new Macbook Air and Mac Mini’s.

Playback
Listen via iTunes
Listen via M4A
Listen via MP3

Shownotes
2:11 – The Hackers Get Hacked
– Looks like hacker group LulzSec is back in action, this time redirecting the homepage of the Murdoch-owned The Sun (http://www.thesun.co.uk/sol/homepage/) to a fake story about Murdoch’s death from a drug overdose located on the Murdoch-owned URL used to broadcast theLondon Times’ redesign http://www.new-times.co.uk/sun. After the amount of requests caused a 404 failure on the Times site, the group then redirected The Sun’s homepage to the @LuzSecTwitter account. (The original page is archived at http://freze.it/pX)
– From what I can see the fake story was meant to mirror an actual The Sun story about the latest development in the messy Murdoch/New Corp/News of the World scandal, “Ex News of the World journalist found dead.” After about 10 minutes of being up (and I swear the real Sun homepage was redirecting) the fake story was pulled from the UK Times site.
– E-mails also grabbed
5:13 – Apple Earnings
– Cupertino just reported its best quarter ever, with earnings of $7.79 per share, revenue totaling $28.57 billion, and a net profit of $7.31 billion. We know you’re probably more interested in sales figures, however, and as you might expect, Apple’s continued to ship iPhones and iPads at a steady pace, with 20.34 million smartphones and 9.25 million tablets sold last quarter. It’s also shipped 3.95 million Macs — a 14 percent jump over Q3 2010’s numbers. Fewer iPods made it out the door this quarter, however, totaling 7.54 million compared to the 9.41 million Apple sold in Q3 2010.
7:26 – Google Earnings
– “We had a great quarter, with revenue up 32% year on year for a record breaking over $9 billion of revenue,” said Larry Page, CEO of Google. “I’m super excited about the amazing response to Google+ which lets you share just like in real life.”
– £3.5 billion in profit
– 550,000 android activations per day
13:30 – Microsoft Earnings
– The US technology giant Microsoft said its annual revenues hit a record of $69.94bn (£43.4bn).
– Sales of the company’s Xbox 360 videogame console and its Office software helped fuel the growth.
– Net income at the world’s biggest software maker jumped 23% to 23.15bn for the year.
– The figures, which beat forecasts, showed final quarter revenues reached a record high of $17.37bn, leading to profits of $5.87bn.
– Sales rose 8% to $17.37 billion, a boosted chiefly by sales of Office, Xbox and server software behind Microsoft’s push into cloud computing.
– Microsoft’s business division, which sells the Office suite of programs, including Outlook, SharePoint and Excel, was the company’s biggest seller in the quarter, increasing sales by 7% to $5.8bn.
– The company’s online services unit, which runs the Bing search engine and MSN internet portal, increased sales by 16.5% to $662m, but saw losses increase to $728m as it struggles to fight competitor Google.
– One weaker spot was sales of its widely-used Windows product, which are slowing as tablet PC sales eat into demand for traditional PCs.
16:43 – Nokia Earnings
– The Finnish phone-maker Nokia crashed to a loss for the second quarter as its smartphone and mobile business collapsed, leaving it in third place in the sector behind Samsung and Apple, and with no clear sign of any improvement in the short term.
Overall the company made a loss of €368m despite receiving a one-off payment of €430m from Apple to settle a long-running patent dispute. Revenues fell overall by 7% to €9.3bn.
– The company’s mobile revenue, normally the stalwart of its business, fell by 20% year on year to €5.47bn and made a loss of €247m, as the number of phones sold dropped by the same amount, to 88m – both figures not seen since 2006. Its existing Symbian smartphone business, which it has said that it will phase out in favour of phones using Microsoft Windows Phone from later this year, fell by 30% year on year to just 16.7m.
– The Navteq mapping and Nokia Siemens Network (NSN) businesses offered no comfort either, both racking up operating losses of €58m and €111m respectively, although sales at NSN were up by 20%.
20:11 – Lion
– Out for £21
– Digital download only
– Ian – speedier, like Mission Control, restore, versioning and some nice touches but overall a bit meh
– Ian – love Mail – hateful design choices on iCal and Address Book
– Ian – gestures is very nice, full screen turning to a Space is good…but OTT on a 27” iMac
– Ian – natural scrolling – disabled as use windows so much – too much adjustment
– August – available from Apple stores on USB stick
– http://www.apple.com/macosx/recovery/
– Lion has Recovery options and new Air and Mini can be recovered from the Internet
– iTunes 10.4 – 64 bit, Cocoa, Full screen
– iWork – updated to support full screen and versioning
– Xcode – 4.1 now free on the app store
37:19 – New Apple Hardware
– Airs – double the speed, more ram, better chip, backlit keyboard and thunderbolt – same price – lovely
– Mini – thunderbolt, better chip, no drive – cheaper – £650 down to £525
– White Macbook – dead
– The 27-inch Thunderbolt Display has an LED-backlit, 2560-by-1440 pixel, 16:9, in-plane switching (IPS) screen, which Apple says has a brightness of 375 cd/m2 and a 1000:1 contrast ratio. A single two-ended cable attaches to a Thunderbolt-equipped MacBook Pro or Air, one lead going to the notebook’s MagSafe power port, and the other to its Thunderbolt port.
-The display has three powered USB 2.0 ports, plus one FireWire 800 and one Gigabit Ethernet port, all connected to its Thunderbolty host – MacBook Pro or Air, Mac mini, or iMac – through that single Thunderbolt cable. The display also has its own Thunderbolt port so you can daisy-chain up to five more Thunderbolt devices
– The display also has Apple’s FaceTime HD camera – an upgrade from the earlier iSight camera – and a 2.1 speaker system with 49 watts of oomph. There’s also an ambient light sensor that’ll adjust display brightness based on the level of lighting in its surrounding environment.
– £900
44:40 – Apple updates International App Store Prices
– Apple update international pricing
– Uk – £0.59 is now £0.69
– Apple’s iWork apps now cost £13.99, up from £11.99, on the Mac App Store in the U.K., while the popular iOS versions have jumped from £5.99 to £6.99.
– Most rises around 10-15% – £1.19 per issue will now pay £1.49 – a 25 per cent price rise
– No warning – magazines running adverts caught out
– Lion price of £20.99 should have been a clue of impending changes in price points
– Certainly interesting that no pre-warning!
46:37 – HTC (Android) Infringes two Apple Patents
– ITC judge prelim judgement finds in favour of Apple – HTC infringes Apple in two areas…
– Decision needs ratifying by a panel.
– Will outcome be ban of product? Damages? Technology Licence?
– And now HTC are willing to negotiate with Apple
50:19 – Fake Apple Stores in China
– Fake stores, look real, sell real products
– Same branding, staff where same brands
– Staff even thought it was real
– Apple are aware…and China are now shutting them down.
51:52 – Illegal Film Downloads up 30% in UK
– The number of illegally downloaded films in the UK has gone up nearly 30% in five years, new figures suggest.
– That research, from internet consultancy firm Envisional, indicates that the top five box office movies were illegally downloaded in the UK a total of 1.4 million times last year.
– Film industry bosses say it is costing £170m every year and putting thousands of jobs at risk.
– But it’s not just illegal film downloading that’s on the rise – research suggests people are illegally downloading more TV shows too.
– The top five most popular shows were illegally downloaded a total of 1.24 million times in the UK last year. That’s a 33% increase from 2006 figures.
– Surely that just reflects the larger capacity broadband that we’re all now getting our hands on (well, some of us at least). Again – the end game is surely that better legit delivery methods need to be put in place. This takes time – so no doubt we’ll see more letters being sent in the mean-time.
53:15 – Cheaper broadband for rural users
– Up to 3m homes and businesses in rural parts of the UK could receive better value broadband services by the end of the year, following an Ofcom decision to force BT Wholesale to reduce the amount it charges other internet service providers (ISPs) to use its networks.
– The communications regulator has ruled that BT must reduce its charge to ISPs each year, by a rate of at least 12 percentage points below inflation. For example, if the RPI inflation rate is 5%, BT will have to cut its charges by 7%.
– The ruling is to take effect by mid-August 2011 and remain in force until 31 March 2014, and paves the way for cheaper broadband prices for millions of consumers and businesses in less densely populated areas across the UK.
– The rural areas set to benefit from the change include parts of Scotland, Wales and Northern Ireland as well as Norfolk, Yorkshire, Cumbria, Northumberland, the south-west of England and other areas. These are predominantly areas lacking in competition among ISPs.
55:12 – Govt releases more data
– Following their pledge and success of data released so far, Cameron has announced another set of data that will be published and available to public and devleopers
– NHS, Education (single portal to compare schools), Crime (more detailed local crime maps), Transport (rail data will be hot), Govt financial transactions – every spend above £500
57:11 – Google detects and warns on malware
– “Recently, we found some unusual search traffic while performing routine maintenance on one of our data centers. After collaborating with security engineers at several companies that were sending this modified traffic, we determined that the computers exhibiting this behavior were infected with a particular strain of malicious software, or “malware.” As a result of this discovery, today some people will see a prominent notification at the top of their Google web search results.”
– Windows malware only
58:43 – Google to kill labs
– Google just announced it is ending its Labs program, in an effort to focus more on its existing products, For many of Google’s hard-core or even medium-core users, certain labs features have become essential tools to personalize the apps to their needs.
– a Google spokesman said that Gmail Labs, Calendar Labs and other Labs will not be shut down, merely the Labs program that brought us such applications as Google Goggles and Google Reader. There are still cool affected apps, but it’s not the end of my personal world.
– 20% projects still exist though
1:00:42 – Think with Google
– The new online channel will feature each new issue of Google’s Think Quarterly along with Think Voices, which showcases the shared experiences and insights of marketing leaders, digital influencers and academics. The content is filled with bite-sized TED-like videos for inspiring ideas on topics like the latest in digital technology, the future of marketing and how to channel innovation to inspire your business decisions.
– add link to youtube channel

Picks
Henry
Halftone
– Halftone goes beyond typical “photo filter” apps to give images a unique, vintage style that makes them look like they came from an old comic strip.
– Easy to use
Comic Life
– Make comics on teh iPad
– Again easy to use with lots of effects that can be added to images

Ian
Conquist 2
– Great strategy game for the iPad
– Lots of singleplayer options – variations on Risk
– Now includes multiplayer
DigitalOutbox Episode 52

DigitalOutbox Episode 52
In this episode the team discuss the new iPhone 4 and E3 keynotes.

Playback
Listen via iTunes
Listen via M4A
Listen via MP3

Shownotes
2:00 – iPhone 4
– 16GB – £499, 32GB – £599
– Unlocked, no white
– Bumper – £25 !!!!!!!!
– Apple online store swamped – much demand then?
– 600,000 pre-orders – http://mashable.com/2010/06/16/iphone-4-pre-order-stats
– Vodafone looking good option
– O2 not accepting new customers until end of July – existing customers only although that includes broadband customers
– iOS now out
– Same as gold master released on day of WWDC keynote
25:45 – New Mac Mini
– Gorgeous design. Tiny. Still no blu-ray. Unibody – No need for spatula’s
– Fast
– Expensive!
– If you’ve got the cash it’s a great HDTV device
– End of Apple TV?
– http://techcrunch.com/2010/06/15/apple-tv-mac-mini
– Rebadged to cheaper cloud solution maybe as per rumours?
29:09 – E3 Microsoft Keynote
– Call of Duty Black Ops
– 9/11/10
– Downloads first on 360 for 3 years
– Hideo Kojima (Metal Gear Solid)
– MGS Rising
– Sword action – cut what you like
– Gears of War 3
– 4 player co-op
– More of the same
– Fable 3
– Oct 26th
– Mmm…more of the same but a revolution
– Halo Reach
– September
– Niiiice
– Kinect – Brand name for Project Natal
– Sign in by waving 🙂
– Voice recognition
– Looks to work well
– Video Kinect – video chat
– Tracks you as you move around
– ESPN – gold members for free
– Kinectimals – virtual pet
– Kinect Sports – from Rare? Hurdles (track and field), football, bowling, boxing, table tennis, volleyball
– Kinect joyride – racing but shit racing
– Kinect adventures – use entire body to play – hole in the wall – piss
– Your Shape from Ubisoft – fitness game
– measures physical dimensions
– looks interesting
– Dance Central – match dance moves to onscreen characters – new Rock Band?
– Kinect For Xbox 360
– Brand name for Project Natal
– Launched this year – Nov 4th in USA
– Star Wars next year – we can all be the fat kid being a jedi 🙂
– Pre-order via Game for £20 – no pricing this week!!
– Forza with kinect – virtual steering wheel, head turns camera
– Walk up to an around car – why couldn’t I do that with a joypad
– Coming 2011 – assuming thats Forza 4
– New Xbox 360
– Built in wifi N
– 250GB
– Same price – £199
– Whisper quiet allegedly
– 5 usb, hdmi, port for kinect
– Shipping to retailers today
– Available later this week
– Everyone in audience gets a new console
– First reports – it is quiet and it’s a good redesign
– July 16th in UK
40:54 – E3 Nintendo Keynote
– Goldeneye – Wii exclusive
– The Legend of Zelda: Skyward Sword – 2011
– Nintendo 3DS
– 3D screen on top
– No glasses required
– Verdict – gives a good illusion of depth – stare at the screen, don’t more head or effect is gone
– Touch screen on the bottom – touch and 3D don’t get along
– There’s a motion sensor and a gyro sensor in the 3DS. There’s one camera on the inside, and two camera lenses on the outside, so you can take 3D photos.
– Will show 3D Hollywood movies
– Kid Icarus demo’d – looks like a Wii game…on a 3DS
45:54 – E3 Sony Keynote
– 3D is the big push
– Wipeout looks amazing, other games not so – too much happening
– Move
– 40 devs working on Move games
– Sep 19th launch, $50, nv controller – $30, move+eye – $99
– Demo with Tiger Woods – looks very accurate
– Playstation Plus
– Exclusive in-game DLC and other content
– Free full games, changing each month
– Early access to demos and betas
– Auto-patching feature, which will detect, download and install updates
– $49 a year
– Also includes Qore
– Allows chatting across games
– Will work if only one person is a plus member
– GT5 – Nov 2nd……………2010
– Killzone 3 next year – 3D and Move support
– 3D looks amazing
– http://arstechnica.com/gaming/news/2010/06/killzone-3-in-3d-incredible-but-who-will-get-to-enjoy-it.ars
– Portal 2
– Next year and also steam cloud support
– PS3 will have ‘best version’ according to Valve
– steam provides the game with “auto updates, community features, downloadable content, and more.”

E3 Wrapup
– Meh unless you like gimmicky add-ons
– Missing titles – Last Guardian? Nothing from Valve apart from Portal…next year
– Lot’s of remakes and this year editions
– one more thing…
– Secret of Mana on the iPhone in 2010 – http://www.joystiq.com/2010/06/15/secret-of-mana-coming-to-iphone-this-year/
– Go on, one more – Crackdown 2 demo out today
54:59 – On Live Finally launches
– June 17 in US
– Free for first year thanks to AT&T partnership
– Then $4.95 a month after that
– First tests
– http://gizmodo.com/5567770/onlive-streaming-game-service-tested-at-home-finally
– Fast, less laggy than expected
– Fuzzy graphics
– Compressed – PS2 like
– Provided your internet is fast enough and you can deal with the fact that the graphical quality isn’t as good as it could be, this is quite a tempting offer. You gain the ability to able to play stuff on lousy hardware (and Macs!), spectate your friends and rent games instead of buy them, but lose a little bit of visual sheen. I think that’s fair.
58:05 – HP and Yahoo Printer Ad deal
– We did warm about this
– Yahoo and HP tie up to print ad’s directly to printers
– So not only do I pay extra for this printer, you then use up my expensive ink printing an ad I might not want
– SHITE!

Picks
Chris
Little Master
– Flash game.
– Actually has an element of cricket about it.
– Lovin the fact that they’ve put the flash game inside an iPad graphic!
– Bowlers start spinning / vary the pace. Hit different areas of the screen to score runs.

Henry
Todays Guardian
– not tried it on the ipad but keyboard navigation on a laptop/desktop is great.

Ian
Reeder for iPad
– best way to review and manage Google Reader content on the iPad
– fast, minimal graphics
– offline reading as well

Mac Mini Media Centre – What Else?

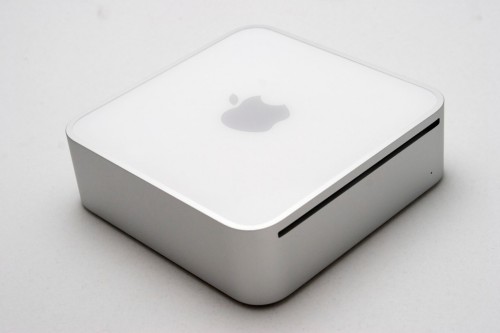
Our last few posts on using a Mac Mini as a Media Centre device have focussed on using Media Centre software like Plex and Boxee to playback locally stored content. While this is my main reason for buying a Mini there is a lot more you can do with it – listen to radio, stream audio and video and play games.

Radio
There are many way to listen to radio via the Mac. The most obvious is via iTunes which comes preloaded with hundred’s of stations. However searching is limited, the streams don’t contain many popular stations and it feels like a tacked on option. If you are serious about your radio there are two options that really stand out

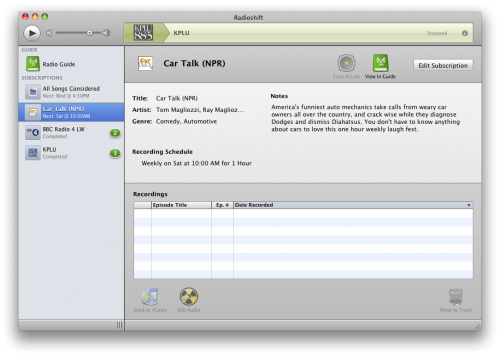
Radioshift can be thought of as a PVR for radio. At the heart of the application is the Radio Guide. Using the guide you can search for stations or individual shows and subscribe to them in the application. The big plus is seeing individual radio shows. You can use Radioshift to subscribe to a show and listen to it live but more impressive is that the application can record the show just like Sky+ does for TV. Radioshift will record multiple shows at the same time and even wake the Mac form sleep so it never misses a show.

The guide is impressive and had a lot of UK content although some of the local stations didn’t have a show list. You also get to see what is popular now and filter stations by genre, location or by full text search. Playback is simple via the application which will also install any missing plugins to maximise the amount of stations it can support. There is no built in audio editor but Radioshift can hand off editing to any installed editor. You can also export audio into iTunes making it easy to listen to recordings on your iPod or iPhone.

Another option for radio is Snowtape. This is a very similar application to Radioshift but with a slightly slicker front end. Snowtape uses an online directory to make radio shows available although I’ve found it to be less complete than the guide in Radioshift. Also, Snowtape includes a built in editor unlike Radioshift. Either app will act as a great recorder for radio so you can’t really go wrong but despite Snowtape being a slightly stronger app I’d choose Radioshift for it’s greater guide.

Streaming
There are many streaming music options now available online. The most obvious one is Spotify. Download the client and over 6 million tracks are available for free. There is a premium option available that improves the audio quality and removes the adverts…which aren’t too obtrusive although the client has got very busy with the random adverts that appear on it. I look forward to the day that Remoteless, an iPhone app that offers full control of Spotify from the iphone, supports a Mac helper app as it’s Windows only at the moment. When that day comes I can switch off the TV and the front end of Spotify and use the iPhone to control my music. Bliss.

Another streaming option is last.fm. More well know for music scrobbling and keeping stat’s on what you and your friends listen to, you can also setup a custom radio station and stream music for free, or stream what your friends are listening to. Grooveshark is a more US centric streaming site which is Flash based and free as long as you don’t mind adverts. Similar to last.fm, you can build up playlists and it has a pretty comprehensive library.

AirVideo
AirVideo is an app for the iphone that will display streamed video from your Mac or PC. Once the server app is installed you can add local video sources which can then be accessed from the iPhone. The app will also access video content from iTunes meaning all video located on your Mac Mini will be accessible on your iPhone, no matter what size phone you have.

In practice I’ve found the streaming to work extremely well on video formatted for the iPhone. Playback is smooth and the application responds quickly. This is of course locally over wi-fi but if you setup your router correctly you can access your content from anywhere in the world. However playback is a little more pixelated with this method and buffering, as expected, takes longer too.

One other feature of Air Video is that it will convert video to an iPhone friendly format. Many formats are supported – mp4, m4v, mov, avi, wmv, asf, mpg, mpeg, mkv, 3gp, dmf, divx, flv – and conversion takes place live. Locally the converted video was quite pixelated but it was acceptable. It also took a while for playback to start but considering that I was converting an mkv then it was to be expected. This is a great add-on for the Mac Mini and makes your video content truly portable.

Gaming
One of the area’s I wanted to explore was game emulation, specifically MAME. MAME (Multiple Arcade Machine Emulator) is an application that tries to recreate the hardware of old arcade machines in software. Using MAME you can then use ROMS to play thousands of arcade games from yesteryear. I have a lot of ROMS so I was keen to setup MAME. There are two main versions of MAME for the Mac. Mame OSX is a port of MAME, is easy to install and run and presents games in it’s gui window. While this worked fine I found a better option in SDLMAME.

SDLMAME can be run as a 64 bit binary but what I like the most is it runs full screen, making the most of the ROMS and recreating more accurately the feel of the old arcade. The front end though needs a keyboard to search and find ROMS. The keyboard is also needed to play the old games. Thats whats let’s it all down – the lack of an old controller.

Well, there’s an app for that. More accurately, there’s a driver for that. If you’ve a wired 360 pad then installing this driver will allow the 360 pad to work and control the Mac. This is great and makes a big difference to MAME. The driver also has one more trick up it’s sleeve.

The driver has support for the Mad Catz Arcade FightStick. With this and SDLMame it feels like an arcade machine from yesteryear. What a great combination! Of course there are many other emulators out there including SNES, N64 and PS-X which all work well and support the 360 pad.

There are some good resources online for getting SDLMame up and running. I used the forums at ShoRyuKen to find out the best Mame options on the Mac. Brian also pointed out this Youtube tutorial for compiling SDLMame using Xcode. Finally there’s a board just for SDLMame on the Emuversal bulletin board that also has links to M+Gui which provides a GUI front end to many Mame tools and works well on the Mac.

Conclusion
I’ve covered a few other suggestions for making the most of your Mini but one obvious omission is broadcast TV. I’m not using the Mini for live TV but there are some great solutions from Elgato for watching, recording and also streaming content to your iPhone. If there is any other software that makes sense for the Mini then please leave a comment with your suggestions.

The next post will focus on content. How to make it from DVD’s and CD’s, where to find it on the internet and how to build your own low maintenance Tivo using your Mac Mini.

Mac Mini Media Centre – XBMC

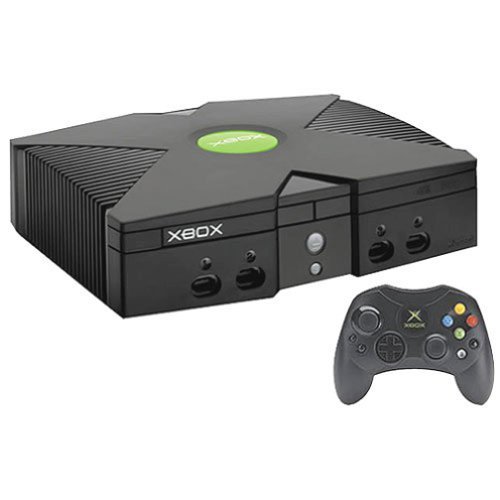
Welcome to the seventh of a series of posts on setting up a Mac Mini Media Centre. This post will look at the daddy of open source media centre app’s, XBMC. When reviewing Plex and Boxee I mentioned that both were forks from XBMC, or Xbox Media Centre to give it it’s full title. In 2004 Xbox Media Centre was born out of another well known app – Xbox media Player. Both app’s were designed as media playback applications for Microsoft’s first console, the Xbox.

When I say Xbox, of course I mean a chipped Xbox. Chipping the Xbox and installing software like XBMC really showed the potential of a games console to act as a media centre device. No restriction on codecs, a great community constantly upgrading the software meant my chipped Xbox was untouchable for quite a few years. In fact it’s still a great media player today except the chip on the original Xbox couldn’t handle HD which for me is a deal breaker. So what does XBMC offer compared to the forked products?
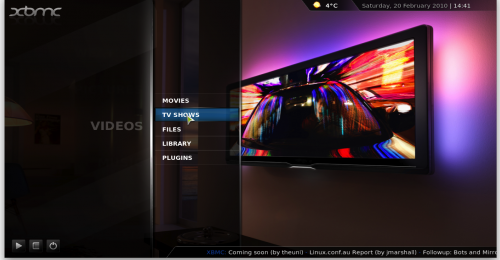
On first pass you can see that Plex and XBMC are very similar products. They share many of the same menu’s, options and skins which in some way isn’t a surprise although Boxee is very different in use than XBMC. In fact when you install the correct skin in XBMC you could be forgiven in thinking that XBMC is exactly the same as Plex. Almost. If you want to read about the functionality that XBMC offers, re-read the Plex review. There are a few differences though. Media shares are easier to add to XBMC and I found the menu’s generally a bit easier to use and follow in XBMC.

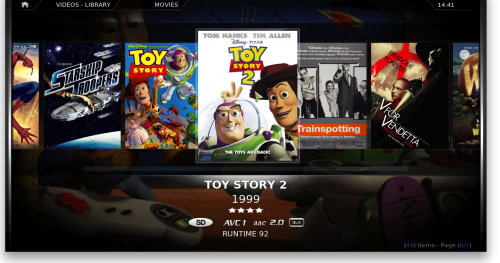
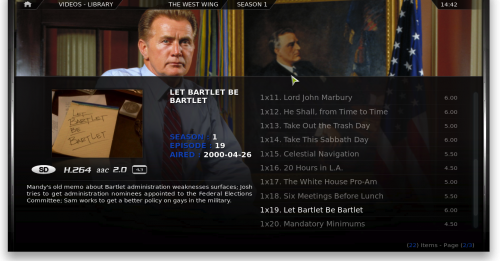
TV and Video’s are also browsable using the same rich content that the scrapers bring to Plex (unlike Boxee) but Music doesn’t integrate with iTunes in the same way as Plex. In fact the biggest difference I could see is that Plex has the Plex media Server which acts as a bridge between Plex and your locally stored media. It’s this that lifts Plex above XBMC in day to day use.

XBMC can also be extended via scripts and plugins. These aren’t as well organised as in Plex or Boxee but there is arguably a wider variety that allow you to access online content not only via audio and video but also via torrents and newsgroups which can integrate into XBMC. This won’t be for everyone though and I again prefer the easier to use accessibility of Plex and Boxee when it comes to installing and using plugins. With full skin support and some great skins available the look and feel is really down to personal preference and there are more skins available than in Plex which does have ports of the popular XBMC skins.

There are two iPhone app’s that work with XBMC. XBMC remote (opens in iTunes) is similar to the Boxee remote in that it allows for full control of XBMC from the iPhone. It has two modes – standard which controls XBMC via buttons and gesture which again I found a bit fiddly to use. It costs £1.79 but if you like XBMC it’s cheap for the features it gives you. Another app of more interest is XBMC Music Streamer (opens in iTunes) which allows you to stream music from XBMC to your iPhone. Again the app is £1.79 and although I’ve not tried it myself it’s got good reviews on the App Store an on other web sites so looks a good choice if you ned to stream your music collection.

Out of the three Media Centre tools I’ve used XBMC probably has the most active forums/developments but some of the developments are also in fairly obscure area’s. With a fully set-up XBMC and Plex it can be hard to tell the difference but for day to day usage I prefer Plex and will be sticking to that as my media player of choice. If you want to dabble with scripts and get into the guts of your media software then XBMC is the better choice. Either way, your spoiled for choice.
The next post in out Mac Mini series will look at other useful media applications that you will find useful alongside Plex, Boxee or XBMC. Until then, happy viewing.

Mac Mini Media Centre – Remote Controls

Our last posts in our Mac Mini Media Centre series looked at Plex and Boxee, two great media centre applications. However one issue I haven’t covered is Remote Controls. What is the best way of controlling your Mac Mini? There are a variety of options and hopefully one of them will suit your needs.

Keyboards and Mice
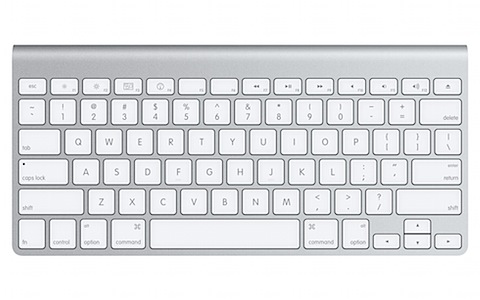
The most obvious control solution is the good old keyboard and mouse. I was lucky in that I had an older bluetooth Apple Keyboard and Mighty Mouse. For me that’s fine as I won’t really use them that often, instead relying on some of the other solutions I describe below. If you need to buy a keyboard and mouse then one little bit of advice – don’t buy a Mighty Mouse! I’m not a fan of the new Magic Mouse either but thats really just personal choice. If your going to buy a mouse I’d go for a Logitech. As for keyboards, there’s a bit more choice. For one you have the newer Apple wireless keyboard.

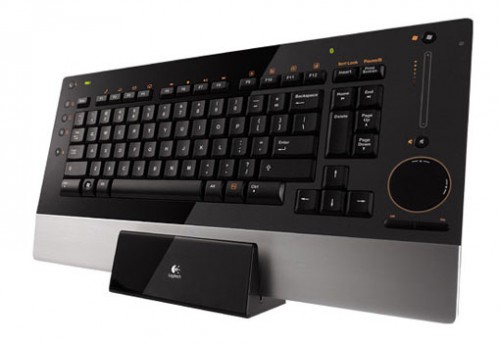
It looks gorgeous, is light on batteries and is tiny. Exactly what you need for a living room keyboard. If only it had a touch pad at the side it would be perfect. Looking elsewhere, Logitech has a nice option with the diNovo Edge. It’s a rechargeable keyboard with a built in touchpad. It looks great and would be a fantastic controller for the Mini but tech that looks that good doesn’t come cheap – £139. Ouch.

One keyboard that’s a lot cheaper and you might overlook is also from Logitech – Mediaboard Pro for PS3. This a bluetooth keyboard that also includes a touchpad with the only problem being the windows keyboard layout but it works perfectly well on a Mac and is only £49.99. Bargain.

Remotes
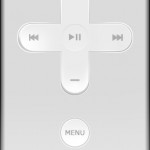
Keyboards and mice are fine but the Mini is acting as a Media PC and as such I want to use a remote to control it most of the time. The obvious option is the Apple Remote. This little remote is straightforward but will allow you to control quite a bit of your Mini. Front Row and iTunes are fully controllable with the remote although you can’t do any searching from it as there’s no keyboard. Plex and Boxee are also fully controllable. If you run Boxee or Plex almost solely on the Mini then you can get by without anything more than the Apple Remote. It’s just a shame that Mac’s used to come bundled with a remote but it’s now a £15 extra which is quite pricey for what it is.

A more complete remote option is the Harmony range from Logitech. Not only can the Harmony replace all your other remotes and control your hardware, it can also work with your Mini. There is support or a wide variety of software but taking a look at the Plex wiki shows that it’s neither straightforward or without issue. If you already have a Harmony then it looks a good option but I won’t be rushing out to buy one anytime soon.

iPhone
If you have an iPhone or iPod Touch there are an increasing number of remote controls available, some far more powerful than the IR remotes mentioned above. So what are the options?

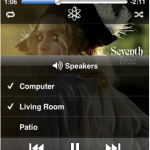
First app that should be installed is the Apple Remote (iTunes link). This connects to iTunes and allows you control your iTunes library. Once installed you can pair the app with as many iTunes libraries as you have in your house. When you launch the app you select a library and then you can browse and playback any music in your library. This doesn’t play through your iPhone or iPod though – you are merely controlling playback on your computer, in this case the Mini. The app is very feature rich though – select from and create playlists, use and update Genius playlists, search the whole library, view album art on the iPhone/iPod and even select the speakers to playback through. It’s free and well worth installing – I just wish you could send music to the iPhone/iPod as well. That would make the app perfect.

Rowmote Pro (iTunes link) is an app that really does make controlling your whole Mac Mini possible from the iPhone/iPod Touch. To work you first must install the Rowmote Helper application on your Mac which is available free from the Rowmote website. Once installed you connect to the iPhone app and once complete you then have an Apple Remote (the physical Apple Remote) on your iPhone. The advantage of this remote though is it works over wi-fi – no line of sight issues with this remote. The app also does far more than the hardware remote. You can wake and sleep your Mac, connect to multiples Mac’s from the one remote, remembering that line of sight isn’t an issue. You can also swap between applications by selecting from a list or by clicking on a dock icon which is displayed on the iPhone.

That covers the £0.59 Rowmote app. The Rowmote Pro version, at £2.99, adds a wireless touchpad and keyboard. This works amazingly well and means you can control virtually everything from your iPhone or Touch without a keyboard or mouse. Searching in Spotify is easily done from Rowmote Pro and it really is a bargain application.

Another app that works similarly to Rowmote is Air Mouse Pro (iTunes link). This too needs a helper app which can be downloaded from their website and is available for Mac and PC. Air Mouse Pro has similar features to Rowmote but supports custom media layouts, programmable hotkeys and multi touch gesture support. It also supports an accelerometer mode which works like a laser pointer to control your Mac. Air Mouse Pro has so many features yet it’s also cheaper at £1.19. It doesn’t support the remote layout seen in Rowmote so it’s probably down to personal preference as to which is better. I’ve found Rowmote Pro more reliable in use than Air Mouse but it’s handy having a Windows option on the iPhone so i have both installed.

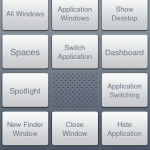
An option worth considering is Keymote (iTunes link). Once the helper app is installed Keymote becomes a keyboard and shortcut enabler. Once the App is paired with the Mini you will see it comes with a few default keysets for DVD Player, Front Row and Expose. They are presented well and allow you to send keyboard shortcuts to the Mini. Note this isn’t a mouse and keyboard replacement – it almost feels like a keyboard extender. You can also create your own Keyset’s for any applications you have installed. Creating your own Keyset is fairly straightforward on the iPhone but it can be a bit awkward moving the key’s around. You can’t choose the size of the keys but you can swap between white and black keys to contrast the layout and the layout can be larger than the screen as you can swipe up and down through the layout. If creating your layout isn’t your thing, Keymote comes with it’s own Store from where you can download other users Keyset’s. This is a great feature and saves a lot of time but there are many duplicates in the Store so it’s a case of trying the 6 or 7 iTunes layouts before settling on one that suits. You can also upload your own Keymotes to the store if you’ve made something unique or better than what’s out there already. This is a lovely app, almost a companion to Rowmote rather than a replacement. It also has uses beyond the Mini. Keymote can be used alongside a normal keyboard like an extender meaning common tasks could easily be applied to a custom Keyset. I’m already looking at Fastscripts and Keymote as a great combination to easily launch custom scripts from the iPhone.

A free alternative to these products is Logitechs Touch Mouse (iTunes link). You again install a helper app which then allows you to connect to your Mac or Windows PC. Touch Mouse gives you a trackpad and keyboard, will display text on screen while typing and supports two finger scrolling. For free it’s excellent but I missed the app launching capabilities of Rowmote and Air Mouse.

Another free option specifically for Boxee is the Boxee Remote (iTunes link). This requires you to setup the web server in Boxee (Settings > Network > Servers ensuring the Web Server is enabled on port 8800) and allows you to control Boxee in two ways – via Gestures or Buttons. Gestures works by dragging the Boxee logo around the app screen. Clicking in a text field displays a keyboard for text entry. It’s a good app but is really for Boxee only.

Finally, a remote app to watch out for. Remoteless is an up and coming remote for Spotify which will offer full control of Spotify from the iPhone. The video demo looks good and I’m hopeful this will be a great controller that allows for full access to desktop Spotify.

Anything Else?
Another way of remotely controlling your Mac is via screen sharing. You can connect from another machine and take full control of your Mini. This means day to day use can be via a remote or iPhone and when you need to tweak then do so via screen sharing rather than the Mini having it’s own dedicated mouse and keyboard. Off course this doesn’t just work locally. You can VNC to your Mini from outside your local network assuming you set up router and Mini to do so. This means that your Mini is always controllable from anywhere in the world.

VNC is also available via a number of clients on the iPhone for those times when you have to access your home computer. It’s not ideal and the screen is small but it can be effective when needs must. This takes quite a bit to setup but opens up a number of interesting possibilities which I’ll cover in a future post.

Conclusion
Hopefully this post has highlighted the variety of options available to you when it comes to controlling your Mini. I’ve settled on Rowmote Pro and Keymote on the iPhone, screen sharing and a very occasional use of keyboard and mouse. Even the use of screen sharing is only when I’m setting up some new software.

Next up in the series is XBMC whose software is at the root of both Plex and Boxee. Previously only available as an add-on for a hacked Xbox it’s now available on Mac, Windows and Linux. I’ll take a look at how to set it up and also how to customise it as it has arguably the most active community driving it forward. Until then, happy controlling.

Mac Mini Media Centre – Boxee

Boxee is a media centre application again based on XMBC but more focussed on the social sharing of media. In this, our fifth part of an ongoing series of Mac Mini Media Server articles I’ll review Boxee Beta which is the latest version of the well known software. Boxee, unlike Plex, is available for Windows and Linux as well as Mac. There is also a version of Boxee that can be installed on a flashed Apple TV.

Creating a Boxee Account
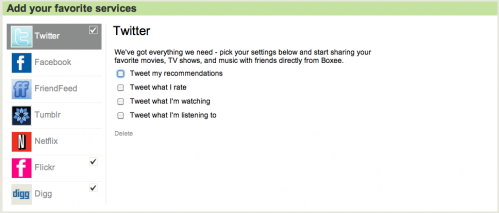
One of the first differences with Boxee is to download the application you first need to create an account. The account you setup isn’t just for downloading the application – it’s the key to sharing your media likes amongst friends. On the website you can add friends who already use Boxee, see what your friends have been watching and recommending and also link your account to other services.

At first I dismissed the services as a gimmick but thats not the case, well not for all of them. Twitter and Facebook linking allows you to post your shares to those sites or indeed everything you are watching. One to watch is Twitter – you could easily annoy your friends with continuos tweets from Boxee. You could also embarrass yourself with some of your viewing habits. You have been warned. Of more use is Flickr and Digg which allow you to connect to your content and access them from within Boxee. One of the better services is Netflix which alas isn’t available in the UK. Yet. Enter your account details though and you can browse your queue, recommendations and start watching films from within Boxee. One day maybe. one day.

Boxee Install
Once the software has been downloaded, installed and launched your presented with the login screen. You only need to do this once as Boxee will remember your details. One nice feature to note – Boxee supports multiple users so for families who want to watch and share out to different friends Boxee is ideal. Once logged in your presented with the home screen which has been redesigned for the beta.

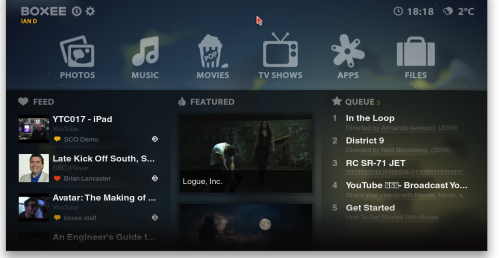
I found the design of Boxee Alpha was cluttered and quite weak. Boxee Beta has addressed this with a clean and simple user interface that makes navigation easy and content quickly accessible. The home screen gives quick access to the various content types, your app’s and also three socially driven streams – Feed, Featured and Queue. This is something that really makes Boxee stand out. Launch Plex and you need to add local content, scan folders or install app’s to play media. With Boxee the Feed is showing content watched or recommended by friends or intially the Boxee staff. Featured is content that is promoted by Boxee. Queue is populated from two sources – you can add content from within Boxee to the Queue or via a bookmarklet installed on your browser. If you find a video online, add it to the queue via the bookmarklet and you can watch it back via Boxee at a later date. Simple but effective. So from first install you have media to play. On first launch of Boxee the queue features a how to video to get you started.

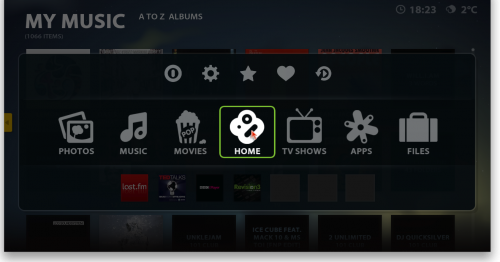
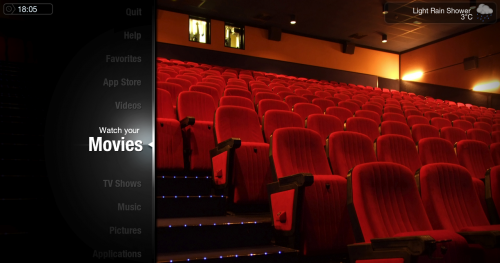
The Global Menu seen above has been added to the Beta which allows for quick access to content and settings. The bottom of the menu also includes a customisable shortcuts menu which means app’s or a favourite TV series can be accessed with ease.

Adding Content
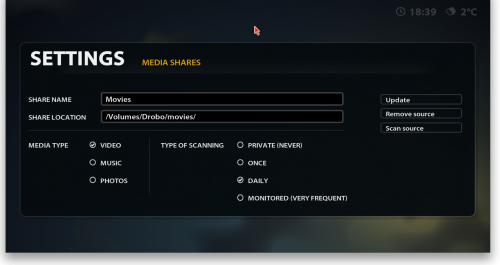
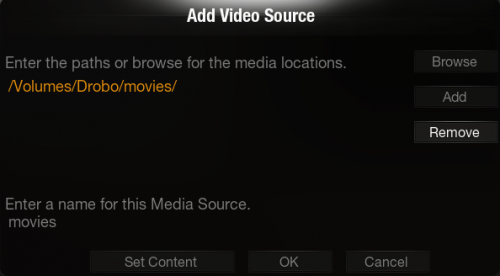
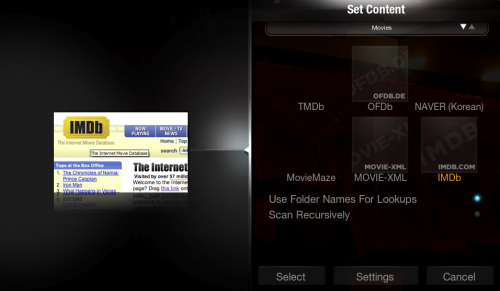
Lots of internet video is all well and good but my main interest is in my locally stored content. Boxee makes it easy to add content compared to Plex. Visit the Settings screen, Media and then you can browse to a local drive or a network share or enter the source manually. Like Plex when entering a source you select a content type – video, music or picture. You can then alter how often the folder is scanned for new content – private, once, daily or monitored which means newly acquired content should be available quickly from within Boxee.

Boxee uses IMDB for it’s scraping and I found it to be good as long as my content was named properly. I keep my naming simple and follow this format for movies:

IMDB Movie Title (Year of film).video extension

For example:

Batman Begins (2005).avi
District 9 (2009).mkv
Slumdog Millionaire (2008).mpg

and this format for TV:

TV Series Name
– Season 1
– TV Series Name – S01E01.video extension

were S01 is Season 1, E01 is episode 1. You can also add episode title in there but I find less is more. Keep the naming simple with the season and episode number and the scraper is far more reliable.

For example:

Battlestar Galactica
– Season 1
– Battlestar Galactica S01E01.mkv
– …
– Season 2
– Battlestar Galactica S02E01.mkv
– …

One issue I did have with Boxee is that there is no obvious way to tell if it’s finished adding content. Visiting the Movie or TV folders showed only some of my media. Going back to Setings and Media and selecting a local folder showed it was still scanning. It would be better if there was a indicator that scanning was taking place – a status window or icon in the top right corner for example.

Another shortfall is that Boxee doesn’t integrate with iTunes unlike Plex. With Plex you can access all your playlists from within the tool itself. With Boxee you need to scan your music folder and there is no playlist support. The dev’s have acknowledged the problem and say it is being worked on for a future version.

Playback
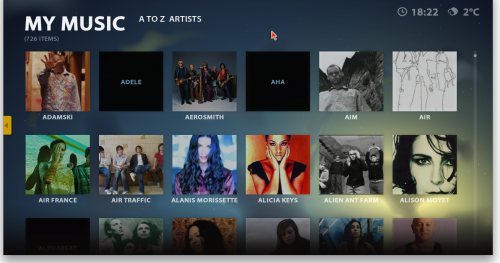
The home screen allows you to access Pictures, Music, Movies and TV as well as app’s. Leaving pictures to one side Music allows you to browse your collection by artist or album. You can also filter by genre and sort to see your latest music. The screens are clean and functional but the lack of playlists really hurts especially with a large music collection.

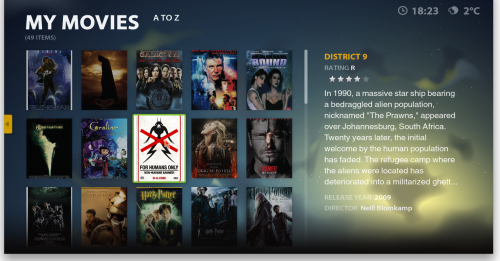
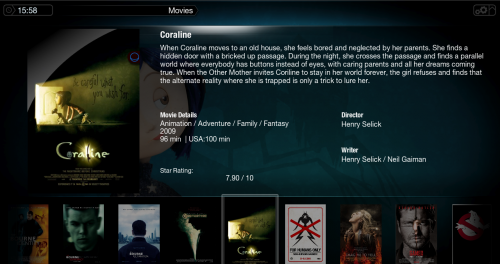
Movies make the most of the IMDB scraping and present either a poster list of your movies or a list. Again the cleaned up UI is noticeable here with scrolling quick and movie selection easy. However compared to Plex it lacks a certain impact. The lack of fan art and other information is disappointing. You also don’t get the variety of views seen in Plex that allow you to browse a wall of images, cover flow type views etc. While not entirely necessary it’s these touches that impact the most in Boxee.

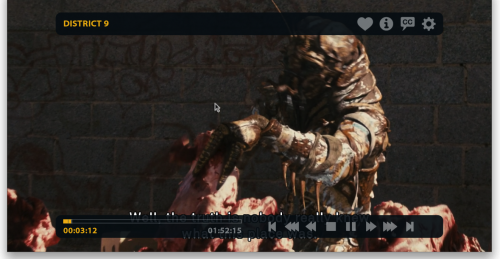
One feature that is good to see is resume from last playback position across all movies and TV shows. The playback screen also allows you to share the video with your friends including adding a comment, see further information on the movie and also change audio and video playback settings for the individual movie or across all of Boxee. One other playback feauture of note – Boxee played back all my content, even those movies that I had issues with in Plex and VLC. Very impressive and makes for a great first impression.

TV Shows are similar to Movies. Boxee groups your TV Shows by programme, then lists then in season order. Again the presentation ‘wow’ is missing in Boxee. No fan art, no theme tunes and very little info on each series and episode. It’s not a deal breaker but if your used to Plex it feels a little empty.

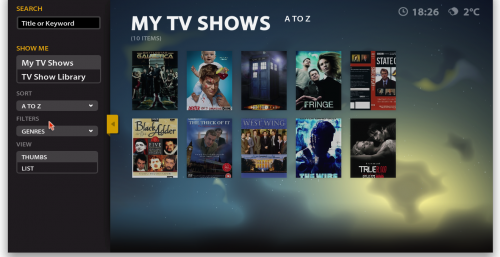
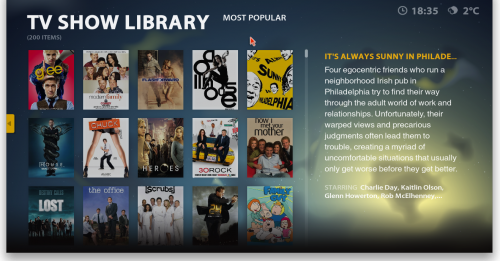
One big difference in TV Shows is the availability of online content…for some of us! In the left hand side panel instead of My TV Shows which displays local TV content only select TV Show Library. This will refresh and display TV series that are available for free in your region.

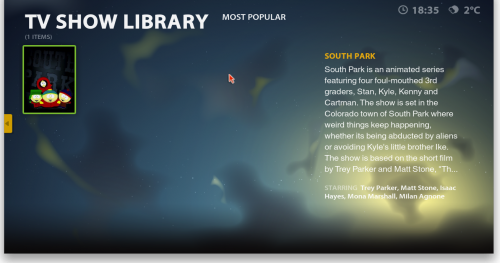
As you can see in the screenshot above there is a lot of content available…if you live in the US. In the Boxee settings there is an option to show or hide network content depending on your geo-location. With this enabled you get a slightly different set of series in the UK.

Yes, South Park. Thats it. The sooner we lose geo-locked content the better although it’s always been this way if you think back to the region locks on DVD’s. Of course there are series available in the UK via iPlayer and 4OD for example but they aren’t hardcoded in to Boxee. Something to raise with the developers.
Applications
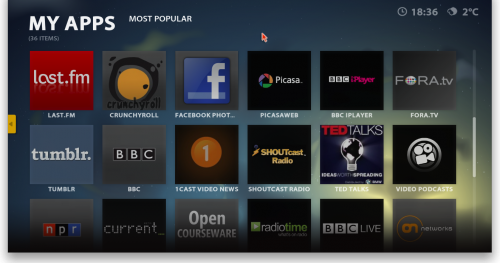
Despite the lack of online content in the TV section there is a vast array of applications that can be installed to help. Similar to Plex you can access iPlayer, Revision 3, Wired and a whole host of other internet based TV and video. There’s also some great photoblogs like The Big Picture which looks great on a large screen.

You can install from over 150 app’s with more being added all the time. I’ve found them to be generally stable and like Plex a great addition to my locally stored content.
Niggles
Boxee, considering it’s free, is a great piece of software. However note that it’s called Beta for a reason. I’ve had it crash three or four times in the last couple of weeks. Twice during the cataloging of content and twice during playback although one of those was a plugin which I’m sure will suffer from a higher level on instability than the main Boxee program.

Although the UI is clean and simple I prefer Plex simply due to the additional data that Plex will scrape. Boxee can feel too clean at times although I’m sure the tool of choice will come down to individual preference. Boxee does come with some customisation options which can be used to spruce it up. You can set backgrounds and if you use some of the images from this Flickr set or the XBMC website you can create a very individual player. It doesn’t support skinning like Plex but it’s at least something.

Final issue is the iTunes integration, or lack off. Browsing music in Boxee is painful with large collections. Fixing this would be a great step forward.

Future for Boxee?
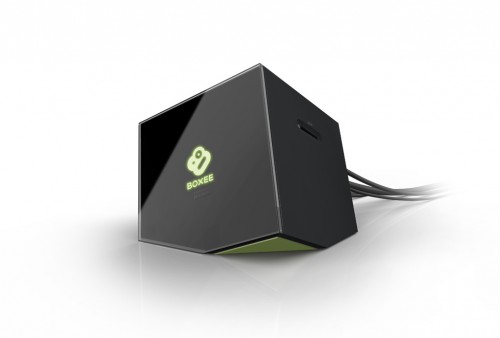
Boxee like Plex is based on XBMC but Boxee has big plans and a lot of funding behind it. Not only is it available on a variety of platforms but this year will see the launch of the Boxee Box.

This will be a relatively cheap under the TV device whose sole purpose is to run Boxee. I think the hardware looks great and it should mean great things for the Boxee platform going forward. They have also announced Boxee Payments coming soon. While this is controversial it’s probably the only natural step to grow Boxee. Content providers want people to pay for their content. Boxee want to be a viewer for the content so payments is a natural step forward.

Overall
Boxee is a great media centre application that will only get better with time with a large and ever growing community supporting it. At the moment I still prefer Plex but both have their idiosyncrasies so it’s really personal choice that will decide which app is for you. Boxee is easier to setup than Plex but gives you less overall control. Plex isn’t as obvious to setup but I think usage is easier once the effort has been made and it’s certainly a richer environment. I’ll shortly be looking at XMBC but the next post will look at a variety of remote control options for your Mini as there’s some great options out there for your Mac.

Mac Mini Media Centre – Plex

Welcome to the fourth in a series of posts on creating a Mac Mini Media Centre. In this article we’ll look at a great media server application called Plex. By default you can use Front Row as a 10 foot interface to access media stored on your Mac and managed via iTunes. Front Row isn’t a bad application but compares poorly to Plex.

Plex is a fork of the legendary XBMC and is currently Mac only. Once installed your presented with a beautiful front end and…not much else. Using a keyboard or Apple remote you move through an animated menu to select Movies, TV, Music and App’s but by default the only media Plex will pick up is that managed locally by iTunes and some default app’s, so the first step is to add your local media content.

Straight away though you hit the first quirk of Plex. How do you add your media? If you visit Preferences there are no options to add media. Visit Movies or TV and there is nothing there either. However, goto View Your Video’s and there you will find options to add your different media sources. Not obvious and hopefully something they address in future versions to help the beginner. The first key step is to separate your Movies and TV video’s into separate content. To add your media browse to it’s location and set a local name for it in Plex.

The important step is to Set Content i.e. TV or Movies. By selecting the content you also select the scraper which will be used to download extra information about your media. By extra information I mean movie ratings, fan art, music, trailers, actor information etc. You’ll see why this is important later in the review when we look at media playback. With content selected, Plex will scan your media folder and download information on your media via the selected scraper. Depending on the amount of media this can take some time.

The first time I scanned my movies folder only 5 out of 50 or so movies were added. This is where I probably had the biggest pain with Plex. The key to getting content added successfully is to name your files properly. Again, the size of the job depends on the size of your library. For movies, the following convention should see your content added correctly with information downloaded from IMDB.

IMDB Movie Title (Year of film).video extension

For example:

Batman Begins (2005).avi
District 9 (2009).mkv
Slumdog Millionaire (2008).mpg

The excellent Plex wiki contains a lot more detail on naming your video files and support for folders including VIDEO_TS folders. I’ve chosen a flat structure with all movie files in the same folder and named as above. Once I’d fixed the file names I rescanned the source folder and all my content was added successfully. Well, almost all. Kill Bill 2 was added as The Killbillies. Close, but not quite right. Plex allows you to select individual files, rename then and also then rescan the file ensuring the correct library information is added. Took less than a minute and my full library was now available. TV is added in much the same fashion. Again, pay attention to file naming to ensure content is added successfully. If you have multiple TV episodes in one VIDEO_TS file then Plex won’t be able to split into episodes. I split up my TV files/rips as follows:

TV Series Name
– Season 1
– TV Series Name – S01E01.video extension

were S01 is Season 1, E01 is episode 1. You can also add episode title in there but I find less is more. Keep the naming simple with the season and episode number and the scraper is far more reliable.

For example:

Battlestar Galactica
– Season 1
– Battlestar Galactica S01E01.mkv
– …
– Season 2
– Battlestar Galactica S02E01.mkv
– …

Despite my careful naming Plex failed to add all my TV series. In fact, out of 10 series only 2 were added. No matter what I did to the name it wouldn’t index my files. I deleted the source and added it again and this time all content was added successfully. Did I mention that Plex could be quirky? If the renaming looks daunting or you want to rename content you download automatically then visit this forum post on Episode Linker – a great tool for renaming files. It takes badly named files and renames and moves them into a structure that Ples understands i.e:

Terminator.The.Sarah.Connor.Chronicles.S02E13.HDTV.XviD-XOR.avi
The Colbert Report 12-01-2008.avi
The Colbert Report 2008-12-02.avi
The.Big.Bang.Theory.2×01.The.Bad.Fish.Paradigm.HDTV.XviD-FoV.avi
The.Big.Bang.Theory.S02E02.HDTV.XViD-DOT.avi

becomes

Terminator The Sarah Connor Chronicles/Season 2/Terminator The Sarah Connor Chronicles – S02E13.avi
The Colbert Report/Season 2008/The Colbert Report – S2008E1201.avi
The Colbert Report/Season 2008/The Colbert Report – S2008E1202.avi
The Big Bang Theory/Season 2/The Big Bang Theory – S02E01.avi
The Big Bang Theory/Season 2/The Big Bang Theory – S02E02.avi

You can also follow these steps for music video’s but I’ve left that for now. With the sources added it was time to actually watch some movies. Moving to ‘Watch Your Movies’ took me to a page with all my movies, and here’s where the scraped content comes in. As you select a movie, fan art backgrounds are viewed and the movie poster is displayed. Not essential but a beautiful way of displaying your content. Using a keyboard or Apple Remote you can easily move through the content and when you want to watch a movie, press play and the movie will launch.

Easy to pause and resume movies, go back and select another movie or bring up more info while movie is playing back. You can change the default movie view so from coverflow to a tiled effect – some really slick options. You can also search and sort which helps when your library starts to get large. Another nice feature is that you can resume any movie from where you left off or start again at the beginning. I’ve found that Plex is far more successful than Quicktime and Perian in playing back HD movies. Almost all my files have played back without issue. I say almost as I’ve had issue with DTS sound. Looking at the Plex forums, some people have converted their DTS audio to wav to get around the issue, some have had joy by tweaking their audio playback settings and there are also posts saying it’s a bug/issue with Plex that will need to be fixed.

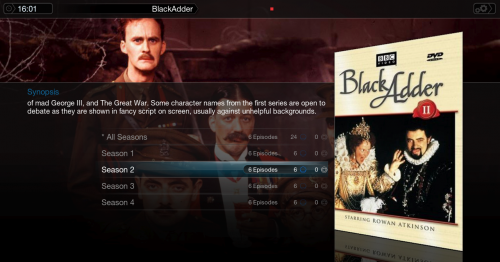
TV works in a similar way to Movies with one nice addition. Select a program and the theme music plays, the background changes to fan art of your choosing and seasons and episodes are displayed. Fluff but really nice fluff. Music is picked up via iTunes and you can select by artist, genre, playlist or by searching to find and play music of your choice. iTunes is easier to use than Plex but once you get the hang of it it’s not too bad. You can also access photo’s via your iPhoto library.

One of the more recent addition to Plex is the App Store – everyone’s got an app store these days. The App Store has a wide range of plugins that allow you to access the ever growing library of video and music content online. You add App’s by visiting the app Store and selecting/installing as many app’s as you like. App’s are then accessed by visiting Watch Your Video’s. Again, this could do with some clean up as it get’s confused alongside media folders and adding new sources.

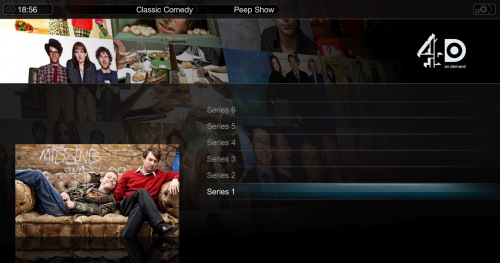
Some obvious plugins that I’ve enjoyed are iPlayer, iTunes trailers, Revision 3, TED Talks, MTV Uk videos and Youtube. A few surprises – 4OD, Channel 4’s On Demand service is pretty good. Access to all episodes of Peep Show? Guardian TV is also an excellent plugin with a wide variety of content from panels discussions to interviews and trailers. Unfortunately there’s also a glimpse at some of the content that we can’t access in the UK – Hulu and Netflix. Maybe this year? The nice thing about the app’s is that by visiting the App Store they auto update which is great. I was worried that I’d be constantly having to manage the app’s to make sure they are working.

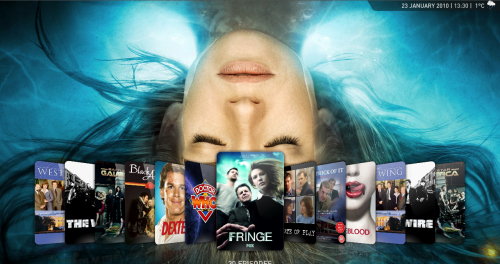
One final bit of setup – you can add up to three locations for the weather page. Is there any media server app that doesn’t check for weather? While in preferences you can also change the appearance of Plex. You can enable RSS feeds and alter the feeds that stream on the home page. You can change font sizes as well and also the default start page for the app. Plex also supports skins and there are a couple of great options to the default skin. PlexAeon is a Plex port of Aeon, which is a skin designed for XBMC. The skin looks amazing and is fully customisable.

Showing the flexibility available, here’s a shot from Plex Alaska. Not as user friendly as some of the other skins but a clean fresh look.

You can even customise the fan art, backgrounds and theme tunes played in Plex. There are more details in the forums and wiki but it’s as simple as creating a graphic or sound file and naming it to match the move or TV show. Plex will then pick up your own graphics instead of the scraped ones. Take a look at the Aeon Project website for backdrops that you can download and use instead of the defaults. Installing skins and keeping them up to date is also now trivial thanks to a script that once installed will download the latest skin files from git repositories. Even better, the script comes with an actionscript so that updating can be done from within Plex.

Delve into settings and you can set visualisations for audio, screen savers, energy savings options, cache sizes, calibrate video and set up scrobbling to Last.fm. There’s a lot more in options that I can cover here but for a free open source package it sure delivers a hefty punch. There’s an active community pushing forward Plex development and the community at the forums are helpful and friendly which is always a good sign for an open source package. What’s also nice is that the Apple Remote is all you need to control Plex as there’s a great deal of thought applied to the UI. You can use a keyboard if you like but I find that overkill. There are other control methods available but that’s for a separate post.

For anyone with a Mac and a reasonable media library it’s hard not to recommend Plex as a wonderful tool for managing and viewing your library. App’s have taken Plex to a new level and made it even easier to find and watch streaming content thats now freely available on the internet. Hopefully the review and the screenshots have given you a taste of what a great looking application Plex is. Next in the series is another XMBC fork, Boxee which promises to do the same as Plex but tap into the social aspect of media playback.

Mac Mini Media Centre – Energy Settings and iTunes Library

With the hardware plugged in and my essential software and codecs installed I was going to crack on with Plex but I needed to sort out my iTunes library and also make a decision – to sleep or not to sleep.

iTunes Library
A quick recap on my hardware setup. I have purchased a Mac Mini and will be using it as a Media Centre device for under the TV. Connected to the Mini is a Drobo. The Drobo holds all my media keeping the Mac Mini virtually free of content. I also currently have an iMac and Macbook pro. My iTunes library was sitting on the iMac but I wanted to move it to the Drobo and access the content from the iMac or the Mac Mini.

Moving the iTunes library was fairly straightforward as I let iTunes manage my music. This is a setting in iTunes preferences which means iTunes looks after the naming and location of all my iTunes managed media. To move the content I followed an excellent guide at iLounge on Transferring your iTunes Library. As I had moved to the iTunes 9 Media layout all I had to do was change the media folder location in iTunes Advanced preferences, then goto File, Library, Organise Library and select Consolidate Library. This copied all the media from the iMac to the Drobo via the network share I had created. Once this was complete I checked that all files including podcasts, movies and mobile applications had been copied and that all my music was now referencing the Drobo – do this by right clicking on a track and selecting Get Info. At the bottom of the Summary tab a Where field details the location of the file.

Once confirmed I then removed all the media content from the iMac. Happy days, or so I thought.

Energy Settings
One of the choices to make with your Mini is whether to have it always on or to sleep when not in use. This will very much depend on what you want to do with the Mini. For me, even though I will be using it for remote access and for downloading media, I still want it to sleep when not in use. I waste enough electricity as it is without having a Mini and Drobo switched on 24/7. So the Mini will sleep when not in use. However, unless you have an Apple Airport Extreme or Time Capsule you won’t be able to Wake on Demand which is a feature that both these devices support for any Apple attached hardware. This means when I start my iMac and the Mini is asleep, my iTunes library isn’t available. When this happens, music won’t play and any downloads will also reside locally in a newly created iTunes library. Not good at all.

To get around this I’m making use of a little known free Mac tool called SleepWatcher. This is a command line tool that watches two scripts – .wakeup and .sleep and will run the .wakeup script when your machine wakes up and .sleep when your machine sleeps. My solution to the sleeping Mini was to have the commands in my .wakeup script to wake my Mini, create a mount point and then mount my music network share. iTunes would then work properly and my music would be available with downloads being placed on the Drobo.

So lets go through each of the steps and explain the scripts I now use. Firstly I downloaded and installed the SleepWatcher utility which comes in two parts. SleepWatcher.pkg installs the actual SleepWatcher command. SleepWatcher StartUpItem.pkg installs the daemon and also the sleep and wakeup scripts that are executed by the daemon. With both installed I was ready to create my wakeup script.

In TextMate I created a new file called .wakeup in my user directory i.e.

/users//.wakeup

so for me

/users/ian/.wakeup

Remember to make the script executable:

chmod 755 .wakeup

I wanted the file to wake the Mac Mini. To do this I installed the WakeOnLan command line utility in a scripts directory in my user folder. Using WOL command line allowed me to wake the Mini using the following command:

wol ip_address mac_address

where ip_address is the fixed IP address for the Mac Mini and the mac_address is the unique MAC address for the network adaptor in the Mini. To find the MAC address for a machine launch System Profiler (Apple Menu, About This Mac, More Info or Applications, Utilities and the System Profiler), select Network and then select the Ethernet Active Service. Scroll through the information displayed and under the Ethernet heading you will find your MAC Address. You could also download WakeOnLan which is a tool which will scan your network displaying connected machines and their MAC addresses. From the command line the wol command worked well but adding it to the .wakeup script did nothing. The Mini would resolutely stay asleep no matter what I did. Odd. I then created a shell script containing the wol command and ran the shell script which woke up the Mini. Odder. I then called the shell script from the .wakeup script…success!

So my .wakeup script as it stands is as follows:

#!/bin/sh
# ------------------------------
# Wakeup Script for SleepWatcher
# ------------------------------

# Wait for network connect
sleep 5 

# Wake Mini and Mount drive
/users/ian/scripts/mnt_mus.sh

The script sleeps for 5 seconds waiting for the network to be up and running and then launches the mnt_mus.sh script which wakes the Mini and then mounts the drive. The mnt_mus.sh looks like this:

#!/bin/sh
# ———————————————
# Wake Mini and Mount Script
# ———————————————

#Wake Mini
/users/ian/scripts/wol/wol ip_address mac_address
# Create Mount Point
mkdir /Volumes/music
# Wait for mini start
sleep 10
# Mount drive
/sbin/mount -t afp afp://username:password@mini.local/music /Volumes/music

So with SleepWatcher, WOL and the scripts above my Mini can sleep and when my iMac wakes, it will wake the Mini and mount the music network share. Happy days. A final step is to call the .wakeup script at logon/startup so that no matter what the event, the network share is mounted. This is easy to do. I copied the .wakeup script to a new file called login.command (creating a command file), made it executable, then added it to my Login Items in System Preferences -> Accounts pane. By making the shell script a command file it makes it accessible to the Login Items GUI. So when I start or wake my iMac the drive will be mounted and I can access my music.

Moving the iTunes Library Database
While the iTunes media has been moved the Library database was still on the iMac. Although it takes up only a few hundred MB I wanted to move it so I could share the library file with iTunes on the Mini. The database file comprises of an XML file which contains all the metadata for your library, a Genius file and the Album Art folder. To move the database I closed down iTunes, moved the iTunes folder to a folder on the Drobo and restarted iTunes with the OPT key held down. This prompts you to create a new library or choose an existing library. I chose the library via the network mount and after a few seconds iTunes was up and running.

Sharing the iTunes Library Database
The final step in the process was to share the iTunes library between the iMac and Mini. I thought this would be simple but it’s not so straight forward. iTunes was built on the assumption that one iTunes would access one library and that’s it. You could share a library between two different iTunes but you must make sure that only one iTunes is accessing the file at any one time or you risk corruption. I don’t like those odds!

I could solve it by putting checks and locks in place like don’t launch itunes on Mini if iMac iTunes is running and vice versa but I’m sure there would be some scenario that would undo me. Therefore I’ve taken the safer route of having the Mini point to a copy of the iTunes database which is synced to keep it up to date. To automate this I’ve relied on SleepWatcher again.

On the Mini I’ve installed SleepWatcher and the .wakeup script calls the following script:

#!/bin/sh
# ------------------------------
# iTunes database Sync
# ------------------------------

# Sync Folders
rsync -a /Volumes/Drobo/music/"iTunes Library Files" /Volumes/Drobo/music/"mini iTunes Library Files"

Using rsync I copy the iTunes database from the folder iTunes Library Files to a separate folder called mini iTunes Library Files. The advantage of rsync is that after the initial copy which mirrors the file and folder structure, only differences in files are copied making the sync quick and painless. Therefore every time the Mini wakes the folder is synced. I created a symbolic link on the Mini to match the networked folder seen elsewhere and bingo – my library was being shared and up to date. I changed the settings on the Mini so it doesn’t download podcasts and I’ll still manage my library on the iMac but read below to see why this may change. I thought that was it but I still had one more issue. iTunes only updates the library files on exit.

To make sure I sync the most up to date library I have created a .sleep file on the iMac and Mini that will close iTunes on the machine sleeping. That script can be seen below.

#!/bin/sh
# ---------------------
# Close iTunes on Sleep
# ---------------------

#Close iTunes
osascript <<< "tell application \"iTunes\" to quit"

It's not perfect but again it's working well for me at the moment and means both computers are sharing the same media files with two different databases. If all the above is a bit too much then there is software like SuperSync or myTuneSync which will keep separate libraries in sync

Future Options
The scripts above are very much a 'now' solution. In the future I plan to consolidate down to the Mini plus one other machine. If that machine turns out to be a laptop then the Mini will act as the master for iTunes and I'll rsync all my music between the Drobo and the laptop so that my music is with me at all times. Extreme perhaps but I do want to access my music wherever I am.

Closing
Hopefully this third post in the Mac Mini series here at DigitalOutbox, although optional, will give you some hints and tips in how to manage your iTunes library and how to best manage your Mini if you want to be a bit more energy efficient. If there is something glaringly wrong or a better way of achieving the above then please leave a comment or drop a mail as I'm sure there are better methods and this is a learning experience for me.

With the first three posts out of the way it's now time to install Plex, but thats for the next post. What a tease!

Mac Mini Media Centre – Setup and Essential Software

In the first part of our Mac Mini Media Centre series we looked at Hardware and Connectivity. Now that the Mac Mini is hooked up to the HDTV it’s time to configure it for Media playback and install some essential software.

The first setup issue is screen resolution. If you’ve got a 1080P HDTV then it’s a simple as plugging in your Mac Mini and you’ll get a full 1080P desktop without issue. If you’ve got a VGA inout then you shouldn’t have a problem either. If you’ve got a 720P HDTV then you may have some tweaking to do to get a full desktop display. Most 720P tv’s are actually 1388*768 panels rather than the 720P resolution of 1280*720. The Mini will pump out a 1280*768 resolution which gives you two options. Live with that resolution and you get a black border around your desktop which is ugly. Alternatively, goto System Preferences and enable overscan. This will remove the border but instead you see half the dock and lose the menubar. Although this sounds bad in actual fact you will be using software like Plex most of the time which can cope well with this scenario so it’s not an issue.

If your not happy with this scenario then a final option is to use SwithResX. With this utility you can tweak the resolutions outputted by your Mac. However care must be taken as this software is basically (my understanding so could be wrong) a hack and it’s easy to set a resolution that your TV doesn’t support, so leaving your Mini displaying a black screen. Always select a resolution via System Preferences so that you can easily use the up/down arrow keys to pick another resolution that works. If you boot and you get a black screen there is advice on the ScreenResX website – good luck!

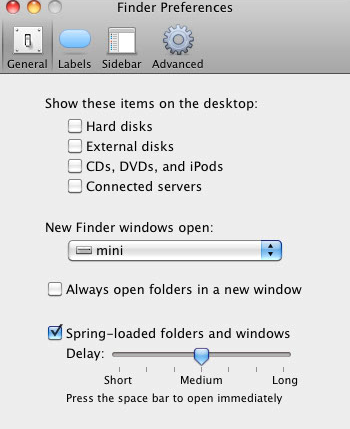
While we’re sorting out the desktop, there’s a couple of other worthwhile tweaks. I want the Mini’s desktop to be clear of any distractions. By default a Mac’s desktop will show external drive’s connected to the machine. To keep the desktop clear, open Finder, select Preferences and under the General icon ensure that all desktop items are unchecked. Speaking of the desktop, select a great background picture that will look good on the TV. Right click on the desktop and select Change Desktop Background or goto System Preferences and select Desktop & Screen Saver. You can pick a folder of pictures and have the system rotate them on a set time or when the Mac wakes up. Another great way of keeping your desktop fresh is to use DeskLickr which is free app that will connect to your Flickr profile, tag searches or a DeskLickr group and set the desktop picture. Unique and pulls up some real gems.

When your media is playing you don’t want to be interrupted or have the system kick of any scheduled tasks or software checks on the internet. Therefore, goto System Preferences and in Software Update disable Check For Updates. You should do similar for any other software that may be running – set checks to manual and every few weeks check for updates.

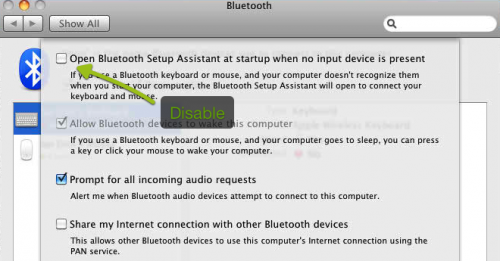
Another potential annoyance is Bluetooth, in particular when a device isn’t detected. In System Preferences select Bluetooth, click on Advanced and uncheck Open Bluetooth Assistant option.

With those out of the way it’s time to get some essential software installed. Remember this is primarily a media centre so I won’t be installing many of the popular Mac app’s.

For video and audio playback the key is codec’s. There are a variety of essential codec’s that should be installed to make the most of any digital content you own. Perian describes itself as the swiss army knife for Quicktime as it comes with almost all the codec’s you’ll need to make Quicktime your goto player. Perian enables support for the following:

  • File formats: AVI, DIVX, FLV, MKV, GVI, VP6, and VFW
  • Video types: MS-MPEG4 v1 & v2, DivX, 3ivx, H.264, Sorenson H.263, FLV/Sorenson Spark, FSV1, VP6, H263i, VP3, HuffYUV, FFVHuff, MPEG1 & MPEG2 Video, Fraps, Snow, NuppelVideo, Techsmith Screen Capture, DosBox Capture
  • Audio types: Windows Media Audio v1 & v2, Flash ADPCM, Xiph Vorbis (in Matroska), and MPEG Layer I & II Audio, True Audio, DTS Coherent Acoustics, Nellymoser ASAO
  • AVI support for: AAC, AC3 Audio, H.264, MPEG4, and VBR MP3
  • Subtitle support for SSA/ASS and SRT

While this add’s greatly to the flexibility of Quicktime it also brings a couple of issues. MKV’s take a long time to load in Quicktime as it likes to know the total length of a movie before starting. This isn’t the fault of Perian but rather Apple in how they’ve built Quicktime.

One codec issue is AC3 support. Apple doesn’t fully support AC3 and to set it up isn’t trivial. This blog post on Record and Reverie details the steps to enable AC3 support but it should be noted that this won’t work with all receivers.

Another essential codec to install is Flip4Mac Windows Media Component for QuickTime. Catchy. This enables playback wma and wmv files in QuickTime and allows you to view Windows Media Content in your browser.

Despite all the codec’s we’ve installed, sometimes QuickTime just doesn’t cut it. That’s where VLC Media Player steps in. This is an open source multimedia viewer, streamer and convertor. To be honest I only ever use it for playback and then you look at the features that’s not a surprise. The only drawback is the shortage of developers which has stopped the development of a 64 bit version.

iTunes is a great app for music playback but Spotify is a great companion. Spotify allows you to stream music for free from a large music library. With collaborative playlists it makes for a great music client.

The majority of internet video content is encoded in Flash so installing the latest version of Flash is also required. One word of warning if your new to Macs. Flash on the Macs is inferior compared to the Windows version. It’s pretty CPU intensive and likes to use up a lot of RAM. This was the case when it was owned by Macromedia and the Adobe purchase hasn’t made much difference. You should also get the latest Silverlight plugin from Microsoft as there is a growing amount of web video that requires Silverlight.

The final two app’s (for the moment) are Xmarks and SuperDuper!. I use Xmarks to sync bookmarks amongst all my browsers and it makes sense to make those bookmarks available on the Mini. I use Sync Profiles in Xmarks to make the bookmarks bar unique to the Mini and also keep some bookmarks exclusively for Work and vice versa. SuperDuper! is my backup tool of choice and it’s easy to backup the Mini to the Drobo so that I have a full disk image backup in case I need to restore. The image is actually pretty small as all of the media is stored on the Drobo and there are very few app’s stored on the Mini.

So that’s the Mini setup. Almost. The next post will detail some specific setup options that I’ve chosen to do to help share iTunes libraries amongst machines and also make the most of the energy saving features on the Mac as I don’t want to run the Mini 24/7. Once that optional post is out of the way I’ll take you through the setup and usage of Plex and that’s when the real fun begins.

Mac Mini Media Centre – Hardware and Connectivity

Wanting to use a Mac as a Media Centre/HTPC? Then this is the guide for you. In the first of a series of posts we’ll describe how to hook up a Mac Mini to an HDTV. Future posts will show how to get the best out of the Mini, the utilities that we recommend and the great playback software available on the Mac but this post will concentrate on hardware and connectivity to your HDTV. We’ll also test some different methods to control the Mac Mini and some great software to get media onto your mac. The first question you may be asking – why a mac?

There are now a variety of technologies and hardware that will act as a media centre for your HDTV. If your a gamer then the Xbox 360, PS3 or the Wii can all act as good media centre machines. However you are limited to the codecs they support and navigating your own content via the software on the consoles which isn’t always the best. Another option is to use a fairly cheap Windows box as an HTPC. Asus and Acer do some cracking Windows machines for £200-£300 and Windows 7 is a great O/S for media playback, but for me it still doesn’t match OS X when it comes to features and stability.

Which Mac?
The natural choice for Mac fans is the Apple TV. This is a device which connects to your HDTV and allows for playback of your own media, rent/buy of HD films and TV via iTunes and a few other nice media features like streaming music, photo’s from other devices etc. However the Apple TV is £223 for a device which has wi-fi and a 160HD. Not ideal as agin it doesn’t support many codecs, although you can flash the Apple TV to install Boxee or other codecs. That leaves the Mac Mini.

This is a fully featured PC that currently (Jan 2010) comes with a 2.26GHz processor, 2GB of Ram and 160GB hard drive. Coupled with the NVIDIA GeForce 9400M graphics card means it’s a great machine for playback of all music and video comeback up to 1080p. One other important feature – it’s tiny and most importantly for me is it’s silent. Drawbacks? Lack of Blu-Ray is disappointing when so many Windows machines come with that option and the price isn’t cheap. In the UK they are currently starting at £510. Not the cheapest but with a little bit of effort I think it’s one of the best options for a HTPC.

Video Connections
So you’ve bought the Mini – how do you connect it to your HDTV?

The Mini has two graphics ports – a mini DVI port and a mini DisplayPort. Apple has standardised on Mini DisplayPort in most of it’s recent hardware so it’s no surprise that the Mini is supplied with a Mini-DisplayPort to DVI adaptor. To connect your Mini to your HDTV you have the following options:

  • DVI to DVI cable – plug into DVI port on HDTV
  • DVI to HDMI cable – plug into HDMI port on HDTV
  • DVI to VGA cable – plug into VGA port on your HDTV
  • Mini-Displayport to HDMI adapter + HDMI cable – connect to HDMI port on your HDTV

Plenty of options and that’s obviously not all as the Mini-DVI port is there and can be used instead.

Audio Connections
That covers video but what about audio? None of the above cables will carry audio from the Mini-DisplayPort – thats what the Audio Out port is for.

This is a standard 3.5mm audio out port which also doubles as a digital out with the right connector. Search on Amazon or online for Mini Toslink to Toslink and you’ll find adaptors similar to the one pictured. Plug this into the Audio Out and you will now be able to hook the Mini up to an Optical in on your amplifier or TV via an Optical cable. This option allows for 5.1 sound to be delivered from the Mini. Note that to get 5.1 sound you must select 5.1 in each application. By default the sound will be output in digital, but digital stereo only. Taking DVD Player for example, goto Preferences and Disc Setup. make sure that Audio Output is set to Digital Out – Built In Output and check Disable Dolby Dynamic Range Compression. See screen below for example.

Later topics will cover the optimum audio settings for media playback software like Plex and Boxee. If you don’t have an optical in then you can make do with a 3.5mm to dual RCA (sometime called dual composite) cable which will give you stereo sound.

Input Devices
The Mac Mini is sold as a BYODKM machine – Bring Your Own Display, Keyboard and Mouse. Catchy, not! The display has been covered above. As for keyboards and mice, you can plug any USB keyboard and mouse into your Mini which isn’t ideal for a Media Centre device. Ultimately the Mini won’t need a keyboard and mouse day to day but for setting up, they are essential. I was lucky in that I had a spare Apple Bluetooth keyboard and mouse which once paired with the Mini has worked a treat. As already mentioned, for short term use any old USB keyboard/mouse will do. Another alternative is to set up the Mac Mini via screen sharing from another Mac. Easy to do as long as the Mac is already up and running.

Logitech do a few keyboards that work wirelessly and also include a touchpad but models that have been recommended elsewhere and are bluetooth include the diNovo Edge which looks gorgeous but should do at £139, the diNovo Mini which is a smaller keyboard and touchpad combo but still pricey at £119 and something you may overlook – the MediaBoard Pro for PS3 at £50. While it’s a bit bigger and less sexy than the other keyboards, it includes a touchpad and is far more reasonably priced. Note that these keyboards are built for Windows PC’s, not for Macs, so some keys are missing like command for example. I should also mention that Apple’s new wireless keyboard is tiny, gorgeous and would be ideal if only it had a trackpad as well. Maybe this year Apple?

Another option is to use an all-in-one remote like the Logitech Harmony range. The advantage with the Harmony range is that it will work with all your A/V equipment and also with your Mac Mini and it comes with profile support for some of the software you use on the Mac, like Plex.

Finally, if you use an iPhone then there are a few app’s that allow you to have total control of your Mini – this will be covered later in the series.

Network, USB, Firewire and Tuners
While the latest Mini comes with wireless N support I’ve chosen to hook mine up via ethernet. Despite the improvements over the years I’ve found ethernet far more reliable, less prone to variation which is important when streaming and it’s far easier to do Wake On Lan (WOL) with ethernet than via wireless. The final connection for me was to plugin my newly acquired Drobo via the Firewire 800 port on the Mini.

One last piece of hardware which many will consider is a TV tuner. Elgato’s EyeTV range has long been considered the best solution for Mac owners. I’m sticking with my Sky HD box for now, mainly for the live sport but over time I can see me using the sky box less and less so I may revisit this at some point in the future.

Boot Time
With the hardware sorted and your Mac Mini connected it’s time to boot, configure and install some software but that’s for a future post.